Lore: The Battle of Betham

“The city, renowned for its vibrant cultural scene, now lay in ruins, engulfed by desolation and
hopelessness.” - Commander Cheri Mildred, Federal Coalition Army Officer after the Battle of
Betham
One city. Two armies. Weeks of fighting.
During the First Void War, the world of Jutler became the site of some of the most intense fighting between the Federal Coalition of Sol and the Protectorate Defense League.
Among the most infamous engagements of the Jutler Campaign was the Battle of Betham.
What began as a Coalition offensive to seize a strategically important settlement became a weeks-long battle of attrition that would consume men, machines, and ultimately the city itself.
A City Worth Fighting For
Before the war, Betham was hardly a place anyone would have expected to become famous for its military history.
Located on the northern continent of Jutler along one of the planet's major rivers, Betham was known for its scenic surroundings and lush forests.
The eastern side of the city was particularly popular for outdoor recreation, making Betham a favored retreat from the larger cities nearby.
The war changed all of that.
By the time Coalition forces arrived, Betham was firmly under Protectorate Defense League control.
The PDL had fortified the settlement and established defensive positions throughout the surrounding area.
For the Coalition, taking Betham meant breaking through those defenses.
For the Protectorate, holding it meant denying the Coalition another foothold on Jutler.
The Road to Betham
The Coalition offensive began south of the city.
Federal Coalition Army and Marine forces advanced through dense forests toward Betham, moving through fog and difficult terrain.
The Protectorate did not simply wait for them.
Local guerrilla forces and Protectorate units conducted ambushes, skirmishes, and hit-and-run attacks against the advancing Coalition formations.
The closer Coalition forces came to Betham, the heavier the fighting became.
One of the first major objectives was Wad's Hill.
The elevated position overlooked the approaches to Betham and had been heavily fortified by the Protectorate.
From the hill, Protectorate artillery could observe and engage Coalition forces attempting to advance toward the city.
The Coalition would have to fight for the high ground before it could properly assault Betham.
RiGs in the Fight
The fighting around Betham quickly escalated beyond infantry combat.
Coalition and Protectorate RiG formations collided as both sides committed heavy mechanized forces to the battle.
Four Mercury Mk II Main Battle RiGs engaged three Protectorate DP-9 "Phantom" RiGs.
The fighting was brutal.
The Coalition would ultimately lose all four Mercury II RiGs during the battle.
The Protectorate's Phantoms proved particularly valuable in the defense of Betham, helping compensate for the PDL's limited manpower.
But the destruction of the armored formations was only the beginning.
The real battle was about to move into the city.
Into Betham
Once Coalition forces reached Betham, the character of the fighting changed completely.
The open battlefield disappeared.
The city became the battlefield.
Every building could become a defensive position.
Every window could conceal a rifleman.
Every doorway could contain a machine gun.
Streets became contested corridors, while damaged buildings provided cover for defenders and attackers alike.
There were no reliable front lines.
Units could become separated from their formations and encounter enemy forces unexpectedly.
Fighting could occur simultaneously on different floors of the same building.
Coalition armor found itself increasingly vulnerable to concealed heavy weapons.
Infantry had to clear buildings one room at a time.
The battle became a grinding struggle for individual streets and structures.
A Battle Without Front Lines
The chaos of Betham made command and control increasingly difficult.
Coalition and Protectorate forces became intermingled throughout the city.
Neither side could reliably determine where the opposing line began or ended.
Artillery strikes fell on defensive positions.
Heavy weapons teams hunted armored vehicles.
Infantry fought through rubble and ruined structures.
The city itself was slowly destroyed as the battle continued.

The fighting became less about maneuvering an army and more about holding the next
building, crossing the next street, or surviving the next assault.
Azar's Apartment
One of the most notable Coalition positions during the battle became known as Azar's Apartment.
A Coalition detachment under Lieutenant Colonel Vivian Azar became isolated during the fighting and was surrounded by Protectorate forces.
The building provided an important observation position over portions of Betham.
From there, Azar's forces were able to direct artillery strikes against Protectorate positions.
Despite being surrounded, the detachment continued fighting.
Protectorate commanders eventually recognized the threat posed by the position and attempted to eliminate it.
Lieutenant Colonel Vivian Azar was ultimately killed during the fighting.
Her death became one of the notable Coalition losses of the battle.
Fighting on Multiple Fronts
Betham was not the only battlefield on Jutler.
While Coalition forces remained committed to the fight for the city, Protectorate forces were simultaneously conducting operations against Ravenburg and JFCB.
Protectorate commanders were forced to move units between the different fronts.
Every formation sent to Betham was a formation that could not be used somewhere else.
Every unit transferred away from Betham weakened the city's defenses.
The battle therefore became part of a much larger struggle across Jutler.
The Protectorate was attempting to hold Betham while simultaneously preventing Coalition advances elsewhere.
The Stalemate
Weeks of fighting produced enormous casualties.
The Coalition had lost four Mercury II RiGs.
The Protectorate had suffered heavy losses of its own.
The three DP-9 Phantoms had helped reinforce the city's defenses, but even they could not change the fundamental problem.
Neither side had enough strength to decisively defeat the other.
Betham had become a battle of attrition.
The Coalition continued to attack.
The Protectorate continued to defend.
And the city continued to disappear beneath the fighting.
Two Armies Leave
After nearly a month of fighting, Federal Coalition leadership finally determined that the cost of continuing the operation was too great.
The Coalition began withdrawing.
Protectorate forces attacked the retreating Coalition rear guard, believing the opportunity existed to inflict additional casualties on the withdrawing enemy.
But there was a twist.
The Protectorate was also preparing to leave.
Local rebel governments supporting the Protectorate had become increasingly unreliable because of internal leadership disputes.
Protectorate Command concluded that maintaining Betham was no longer worth the resources required to defend it.
The PDL began its own withdrawal.
Neither side realized that the other was doing the same.
For all the fighting, all the casualties, and all the resources committed to Betham, neither army would ultimately hold the city.
The Destruction of Betham
The Coalition was unwilling to simply allow the Protectorate to return.
After the withdrawal, Federal Coalition forces subjected Betham to heavy artillery bombardment.
HAVOC strikes followed.
The remaining structures of the city were devastated.
The civilian infrastructure that had survived weeks of fighting was destroyed.
Betham, once known as one of Jutler's scenic retreats, was reduced to rubble.
The city became uninhabitable.

The Aftermath
Betham remained abandoned for years during the Remnant Era.
The ruins became a lasting reminder of the First Void War and the terrible cost of the Jutler Campaign.
The battle also had consequences beyond the destruction of the city.
The collapse of local rebel cooperation around Betham contributed to the Protectorate's wider struggle to maintain control of Jutler.
For the Coalition, Betham became a cautionary example of what happened when a supposedly decisive offensive became trapped in prolonged urban warfare.
There had been no clean victory.
No triumphant occupation.
No decisive final assault.
There was only an exhausted battlefield and a destroyed city.
A City Rebuilt
Betham would eventually rise again.
Following the United Commonwealth of Martyr's annexation of Jutler, the city was rebuilt.
Its forests and recreational areas were restored.
The settlement once again became a place known for its natural beauty rather than its battlefield.
The reconstruction of Betham became a symbol of resilience.
The war had destroyed the city.
It had not destroyed its future.
The Battle of Betham on the Tabletop
The Battle of Betham captures many of the defining elements of the Jutler Campaign:
Combined-arms warfare
Mechanized combat
Infantry assaults
Fortified positions
Urban fighting
Artillery support
Difficult terrain
Attritional warfare
Competing objectives
The battle is not simply about destroying the opposing army.
It is about taking ground, holding positions, managing limited forces, and deciding when the cost of continuing the fight has become too high.
That is what made Betham such a defining battle of the First Void War.
And that is what makes it an ideal setting for the Battle of Jutler Starter Set.
The Battle Begins
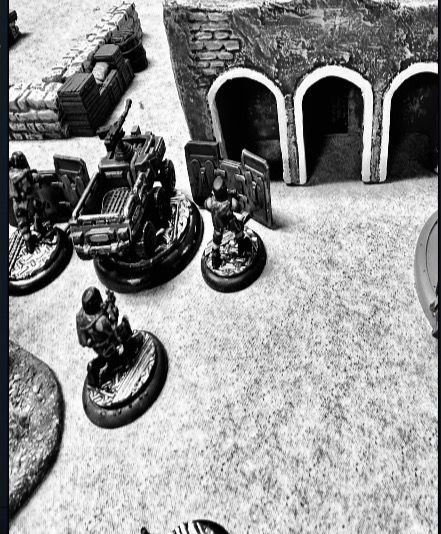
The Battle of Jutler Starter Set brings the forces, machines, and fighting of the Jutler Campaign to your tabletop.
The story of Betham is one of the battles that defined the campaign.
Now, you can decide how the battle unfolds.
Hold the line. Break the defenses. Take Betham.
Coming Q3 2026